A well-designed dessert table isn’t just a sweet treat—it’s a showstopper. At weddings, birthdays, corporate events, baby showers, or even casual get-togethers, a beautiful dessert table creates a visual centerpiece, sparks conversation, and leaves guests with a lasting (and delicious) impression.
But crafting a dessert display that’s as functional as it is fabulous takes more than just placing cookies and cupcakes on a table. It’s about thoughtful planning, cohesive design, and a balance between creativity and practicality.
In this complete guide, you’ll learn how to plan, style, and build an unforgettable dessert table for any event, no matter your theme or budget.
Start With a Theme or Concept
Like any standout element of a party, a dessert table works best when it matches your event’s theme. A cohesive design helps guests immediately understand the tone of the celebration.
Ideas include:
- Romantic and elegant: perfect for weddings and engagement parties—think soft florals, lace, pastels, and candlelight
- Rustic and natural: ideal for outdoor events—use wood crates, greenery, linen, and earthy tones
- Bold and modern: great for birthdays and corporate events—use clean lines, geometric displays, and metallic finishes
- Whimsical and fun: best for kids’ parties—think cartoon characters, bright colors, and playful shapes
The theme influences your color palette, dessert choices, signage, props, and overall presentation.
Choose the Right Location and Setup
Before you decide what goes on the table, decide where the table goes.
Ideal placement:
- Against a wall or backdrop for support and styling
- Away from direct sunlight, especially outdoors
- On level ground for safety and visual balance
- Accessible but not in the middle of guest flow traffic
The size of your table should match your guest count and dessert volume. Too small, and it will look cramped. Too large, and it might feel empty.
Common table options:
- 6-foot or 8-foot banquet tables (for larger events)
- Vintage furniture like dressers or sideboards (for styled shoots or rustic themes)
- Multiple tables in an L or U shape (for visual variation)
Make sure the table is sturdy—it needs to hold a lot of weight!
Design the Backdrop First
Your backdrop frames your entire display. It’s what draws people in, sets the scene, and appears in almost every photo.
Backdrop ideas:
- Balloon garlands in theme colors
- Custom banners with names, initials, or event title
- Fabric drapes or tension backdrops
- Greenery walls or flower arches
- Neon or wooden signage
- DIY photo collage or digital screens
Choose materials and colors that don’t overpower your desserts but elevate the theme. If the venue already has a decorated wall, consider adding a minimal touch like a monogram or garland.
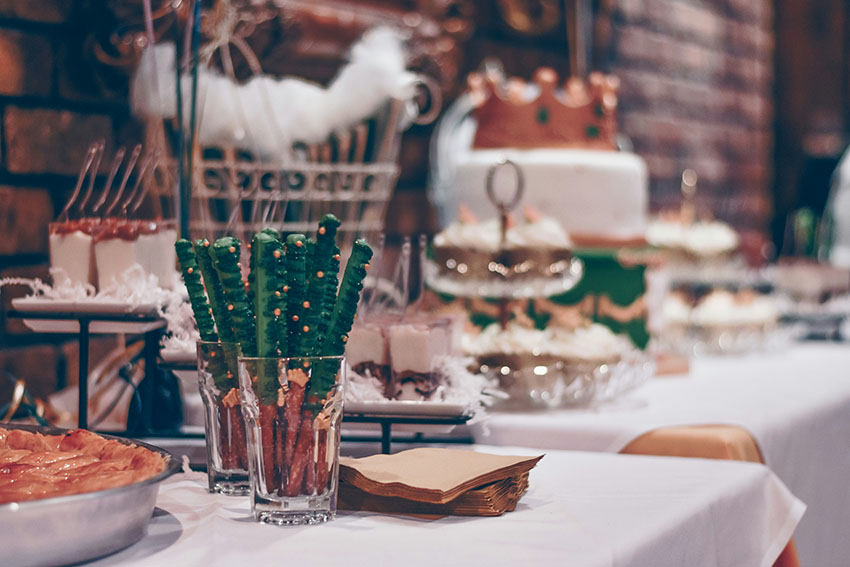
Balance Height and Layers
One of the biggest mistakes in dessert tables is placing everything at the same level. Varying heights create interest, movement, and accessibility.
How to create levels:
- Use cake stands, risers, boxes, or crates
- Stack books under tablecloths for hidden lifts
- Hang some items from the backdrop (like candy bags or cookies)
- Layer desserts from front (shortest) to back (tallest)
Centerpieces (like tiered cakes or donut towers) work best when placed at the center or slightly off-center to create balance.
Offer a Variety of Desserts
Not all guests love cupcakes—and that’s okay. Offering 4 to 6 dessert types ensures variety and encourages guests to try more.
Popular options:
- Cupcakes with themed toppers
- Mini pies or tarts
- Cake pops or push pops
- Macarons in coordinated colors
- Chocolate-covered strawberries
- Candy jars with scoops and favor bags
- Cookies in fun shapes or personalized designs
- Marshmallow skewers, brownies, or Rice Krispies treats
For a high-end touch, consider:
- Mousse cups with gold spoons
- Mini cheesecakes or eclairs
- Custom chocolates with edible gold leaf
Include options for dietary restrictions (gluten-free, vegan, nut-free) if possible. Label these clearly for safety.
Consider Your Guest Count
How many desserts should you serve? It depends on your guest count, time of day, and whether you’re serving a full meal.
General rule:
- 2 to 3 pieces per guest if other food is being served
- 4 to 6 pieces per guest if dessert is the main feature
For example, if you expect 50 guests and plan 4 pieces each, that’s 200 total treats. Divide them evenly across your dessert types and display extras behind the scenes for replenishing.
Make It Interactive
Guests love experiences—and dessert tables are a perfect opportunity.
Interactive dessert ideas:
- DIY cupcake or cookie decorating station
- Candy scoop bar with mix-and-match options
- Chocolate fountain with dippable treats
- Build-your-own s’mores or ice cream sundaes
- Toppings bar with donuts or waffles
If your event includes children, designate a kid-friendly dessert zone with fun containers and colorful treats.
Design With Color and Style in Mind
A cohesive color palette keeps your dessert table polished. Don’t mix every color just because the desserts are different. Instead, design your table like a magazine spread.
Tips:
- Use 2–3 core colors that match your theme
- Add neutrals to balance out bold hues
- Match trays, stands, and containers (or coordinate with textures)
- Add greenery, fresh flowers, or fruit for organic accents
Don’t forget linens. A tablecloth, runner, or fabric backdrop can tie everything together beautifully.
Label Your Desserts With Style
Dessert labels serve two purposes: informing guests and adding charm.
Ideas for labels:
- Chalkboard signs for rustic themes
- Clear acrylic signs for modern looks
- Tent cards with gold trim for formal events
- Printed tags with ribbons or calligraphy
Make sure labels are:
- Easy to read
- Matched to the color scheme
- Including notes on allergens or dietary info
You can also include fun names like “Bride’s Favorite Brownies” or “Unicorn Magic Macarons” to add personality.
Add Finishing Touches
The magic is in the details. Final touches bring your table to life and make it feel intentional.
Extra styling tips:
- Fairy lights or string lights for ambiance
- Seasonal or themed props (e.g., pumpkins, seashells, snowflakes)
- Framed photos or quotes about love or celebration
- Floral arrangements in small vases or scattered petals
- Coordinated dessert boxes or take-home bags
Be careful not to overcrowd the table—leave breathing room for each element to shine.
Take Lighting and Timing Into Account
Good lighting is essential, especially if your table will be a photo hotspot. Natural light is best, but if your event is at night or indoors, add light fixtures strategically.
Tips:
- Position the table near windows or use uplighting
- Avoid direct sunlight that can melt chocolate or icing
- Use battery-powered candles or LED tea lights for safety
- Ensure your dessert colors photograph well under available lighting
Plan for the desserts to be at their peak—don’t set up hours in advance unless you’re using heat-resistant or pre-chilled options.
Work With Professionals or DIY Like a Pro
If styling isn’t your strength or you’re short on time, hire a dessert stylist or full-service vendor. Many offer packages that include setup, display materials, and take-down.
If you’re DIY-ing:
- Create a sketch of your layout in advance
- Take photos as you set up for final adjustments
- Use plastic wrap or covers to protect items before the event begins
- Enlist 1–2 helpers for setup and maintenance during the event
Having a clear plan prevents last-minute scrambling and lets you enjoy the event too.
Capture the Moment
Don’t forget to document your dessert masterpiece! It will likely be one of the most photographed elements of your event.
Tips for dessert table photography:
- Shoot from multiple angles: front-on, side view, overhead
- Use a portrait lens or phone portrait mode for detail shots
- Capture wide shots before guests arrive and close-ups once it’s filled
- Take photos of labels, backdrop, and individual desserts
If you have a photographer, ask them to focus on the dessert table early—before guests start picking at it!
Final Thoughts
A well-styled dessert table is more than a place to grab a cookie—it’s a work of edible art, a photo backdrop, and a conversation starter. Whether you go simple and elegant or bold and extravagant, the secret is in the planning, presentation, and personality.
With the right balance of style, variety, and function, your dessert table can elevate your event from sweet to spectacular—and leave your guests with a taste of something truly memorable.